

I edited width, alignment, etc. of my Flet code originally written as a desktop app to make it work as a web app. In this post I’m going to introduce how to build and deploy your Flet app as a static website (client-side, HTML + JavaScript). This deployment should work on an ordinary web hosting server, and you don’t need to know about web server side technology. You can learn how to add Google AdSense advertisement to your Flet web app as well.
Contents
Preparation
Please refer to my previous post and build your environment. It’s mainly targeting macOS. The sample Flet app code is used in this post.
How to build Python GUI app on macOS with Flet
In case you’re looking for server side deployment
My another post below introduces how to depoloy your web app on an Apache web server. Should you have a Nginx web server, refer to the official guide.
Host Flet web app behind Apache web server by Reverse Proxy
Build as a web app
Complete the preparation steps 1 through 12 in the other post. Build options won’t make much difference for web, so simply run the command below. It takes some time to complete.
flet build webTest locally
Built files are placed in build/web. Let’s test locally before pushing to a server. Execute the command and open the URL (http://localhost:8000) in your web browser.
python -m http.server --directory build/web
# Press Ctrl + C to exit.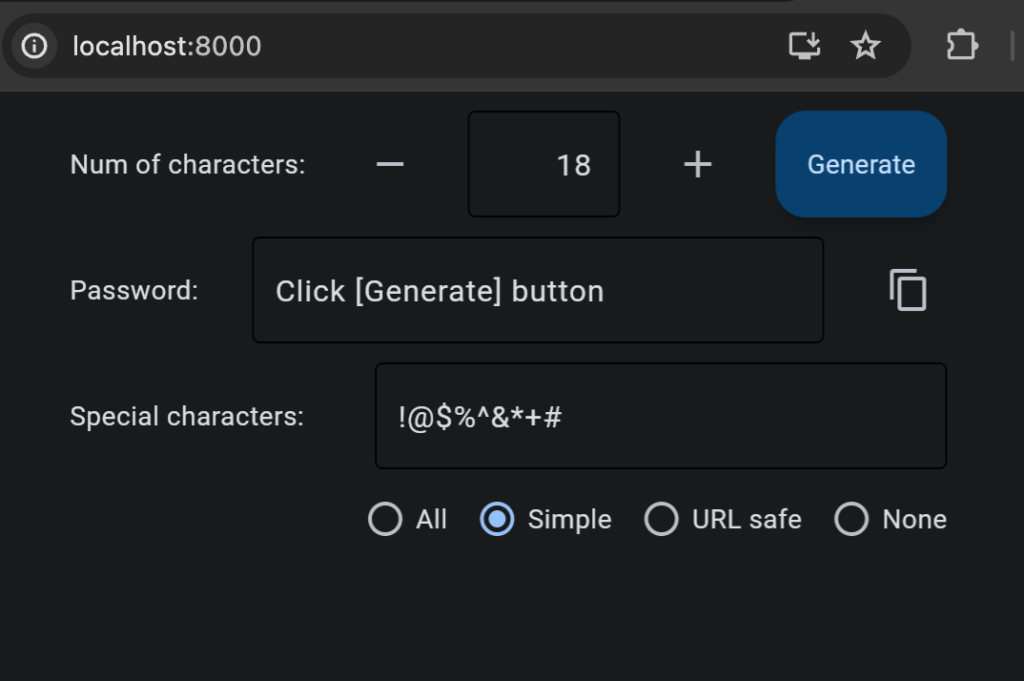
Little more steps to upload
Specify the directory name
In this example, the web app will be deployed to https://blog.peddals.com/fletpassgen, so change the path in index.html. (By adding a build option --base-dir "/directoryname/" you can avoid this step, but you cannot test locally.) Edit index.html like the below. Make sure you have the directory name between slashes (/).
<base href="/fletpassgen/">Compress the entire folder
Change the folder name from web to the directory name, and compress it as a single file. You get fletpassgen.tar.gz as a result of these commands:
cd build
mv web fletpassgen
tar cvzf fletpassgen.tar.gz fletpassgen
Upload and extract
Upload the compressed file
To upload the compressed file to a hosting server, this example uses the scp command in Terminal.app. Replace username, hostname and upload directory based on your account details.
scp fletpassgen.tar.gz username@hostname:~/public_htmlLogin server and extract the file
If ssh is allowed, login your server and extract the file like the below. The directory has to be extracted in the correct location. In this example the web app will be in the subfolder /fletpassgen/ so it’s extracted in the document root of the website.
ssh username@hostname
cd ~/public_html
tar xvf fletpassgen.tar.gz
rm fletpassgen.tar.gz
Access the site by web browser
Your web app is ready now. URL should be like this: https://blog.peddals.com/fletpassgen/
After showing an icon for some moments then your web app will start working.
Few things to check if it’s not working
With this building method (static web app), the total size of files tends to be big. My example resulted 28MB in total. As the first access will take some time to download all required files, you have to be patient and wait until the app to be ready to start.
In case you don’t even see the icon after several seconds, take a look into the directory name in index.html, actual name of the extracted directory, user/group ownership and access permissions.
Tips and notes
Use same code for desktop and web apps
You may notice the layout of contents is broken when opening your app in web browser (I did!) Use ft.Container to place contents and width= property having the same value as page.window_width= so the horizontal layout will be kept in a wider window. For a simple app, having the below parameters keeps your app at the top center even in a web browser.
    page.vertical_alignment = ft.MainAxisAlignment.START
    page.horizontal_alignment = ft.CrossAxisAlignment.CENTER
File size is big
As I wrote, even this small app (Python code is approx. 3.9KB) becomes 28MB in total after a build. You need to put your eye on the available disk space.
App keeps running once loaded
Since this deployment method does not require a code to be running on the web server, your app keeps running in a web browser even when the network is down. For a simple tool it can be an advantage (I don’t know who needs a new password when offline, though).
This is a known issue. Hopefully it will be resolved in the near future, but at this moment copy works on Chrome but not on Safari. I added a code to hide the copy button based on the user agent, but it does not work. flet build web deployment won’t be able to get user agent unfortunately. You need to deploy as a server-side app if you want to add browser specific features.
Bonus: add Google AdSense advertisement
You can find this type of information for Flutter quite easily, but some of the ways I found didn’t work for my Flet app. If you’re looking for a solution, try this:
Get AdSense strings
Login your Google AdSense account, create new ad or click on the Get code < > icon of an existing ad to get strings.
Google AdSense > Ads > By ad unit > Display ads > Give it a name and Create > take note of the below two lines.
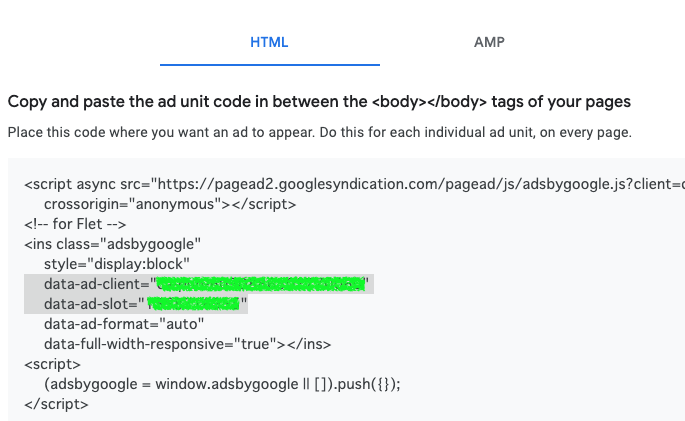
             data-ad-client="xxxxxxxx"
             data-ad-slot="yyyyyyyy"
Add style to index.html
Edit the index.html file in the Flet web app directory and add the below CSS code, right above the </style> tag. Line numbers are just reference (Flet ver. 0.19.0).
    footer{
        width: 100%;
        height: 100px;
        text-align: center;
        padding: 0;
        position: absolute;
        bottom: 0;
        z-index: 100;
}Right above the last line </body></html> of the index.html, add the below code. Replace highlighted xxxxxxxx and yyyyyyyy with strings you copied.
  <footer>
    <style>
    .example_responsive_1 { width: 320px; height: 100px; }
    @media(min-width: 500px) { .example_responsive_1 { width: 468px; height: 60px; } }
    @media(min-width: 800px) { .example_responsive_1 { width: 728px; height: 90px; } }
    </style>
        <script async src="https://pagead2.googlesyndication.com/pagead/js/adsbygoogle.js"></script>
        <!-- Home_Page -->
        <ins class="adsbygoogle"
             style="display:inline-block"
             data-ad-client="xxxxxxxx"
             data-ad-slot="yyyyyyyy">
        </ins>
        <script>
    (adsbygoogle = window.adsbygoogle || []).push({});
    </script>
  </footer>
Save the file. You’ll see a horizontal ad at the bottom of the web page. If you just created a new ad, it may take some time for it to appear. Enjoy!
Image by Stable Diffusion
Date:
2024-Jan-29 0:04:44
Model:
realisticVision-v20_split-einsum
Size:
512 x 512
Include in Image:
masterpiece, best quality, retro future, successful upload of application
Exclude from Image:
Seed:
3400661084
Steps:
20
Guidance Scale:
20.0
Scheduler:
DPM-Solver++
ML Compute Unit:
CPU & Neural Engine