You may need to install tkinter separately if it’s gone.

Recently I started working on some small Python GUI programs. Last year on an Intel Mac I found tkinter was not good as it had some issues with Japanese input method so I gave up. It’s been more than a year and I have a M1 (arm) Mac so there might be some improvements with tkinter. Upgrading Python3 (and all programs) by brew was the first step I tried, then tkinter module was unable to be loaded any longer…

You always better read install log which gives you necessary info.

I didn’t really pay attention to the brew log when upgraded Python from 3.9.1 to 3.9.6 as it was successful and must be a minor update… Soon after the upgrade my Python scripts that import tkinter in a pipenv shell started giving me error “No module named '_tkinter'“. Lots of trials and errors referring to several web pages, tech threads, etc. didn’t help. Tried setting up pipenv from scratch, installed tcl-tk by brew, added PATH and some other tcl-tk variables to .zshrc to no avail. I finally decided to give up and went to bed – worst case scenario I need to uninstall and install all Python related things including brew… On the day-2, I was calmer than last night and started identifying the scope of the problem – ok, tkinter cannot be found even out of my pipenv. It’s really gone from macOS Big Sur at some point. Reviewed steps taken on the day-1 and it didn’t take much time to find the below:

% brew info python3
python@3.9: stable 3.9.6 (bottled)
Interpreted, interactive, object-oriented programming language
https://www.python.org/
...snip...
tkinter is no longer included with this formula, but it is available separately:
  brew install python-tk@3.9
...snip...

Aha! If I read the brew install log once completed, I didn’t need to waste 6 hours and would have a sweet dream. Anyways, if your tkinter is gone after upgrading Python by brew, just execute another command brew install python-tk@3.9 and install it as well. My scripts finally open tkinter GUI windows with no error.

Most of Python documents or webpages suggest you to try tkinter for GUI development as it’s installed by default, but it’s not true anymore especially for those of you who install Python by brew on Mac.

Example of the error in my case

% python3 -m tkinter
Traceback (most recent call last):
File "/opt/homebrew/Cellar/python@3.9/3.9.6/Frameworks/Python.framework/Versions/3.9/lib/python3.9/runpy.py", line 188, in _run_module_as_main
mod_name, mod_spec, code = _get_module_details(mod_name, _Error)
File "/opt/homebrew/Cellar/python@3.9/3.9.6/Frameworks/Python.framework/Versions/3.9/lib/python3.9/runpy.py", line 147, in _get_module_details
return _get_module_details(pkg_main_name, error)
File "/opt/homebrew/Cellar/python@3.9/3.9.6/Frameworks/Python.framework/Versions/3.9/lib/python3.9/runpy.py", line 111, in _get_module_details
__import__(pkg_name)
File "/opt/homebrew/Cellar/python@3.9/3.9.6/Frameworks/Python.framework/Versions/3.9/lib/python3.9/tkinter/__init__.py", line 37, in
import _tkinter # If this fails your Python may not be configured for Tk
ModuleNotFoundError: No module named '_tkinter'

Select the Python version (2.x or 3.x) per a file basis in Pythonista 3

There are two Python versions available in Pythonista 3

In Pythonista3, you can select Python version to execute your code – tap and hold the right triangle next to the file name and select 2.7 or 3.6. Usually 3.6 which is default should be fine, but in case you need to run a code written in Python 2.x you’ll need this feature.

6DF76B93-53C3-4D19-B1AD-37FD314A1BD5.jpeg

Some commands on StaSh are written in Python 2.x

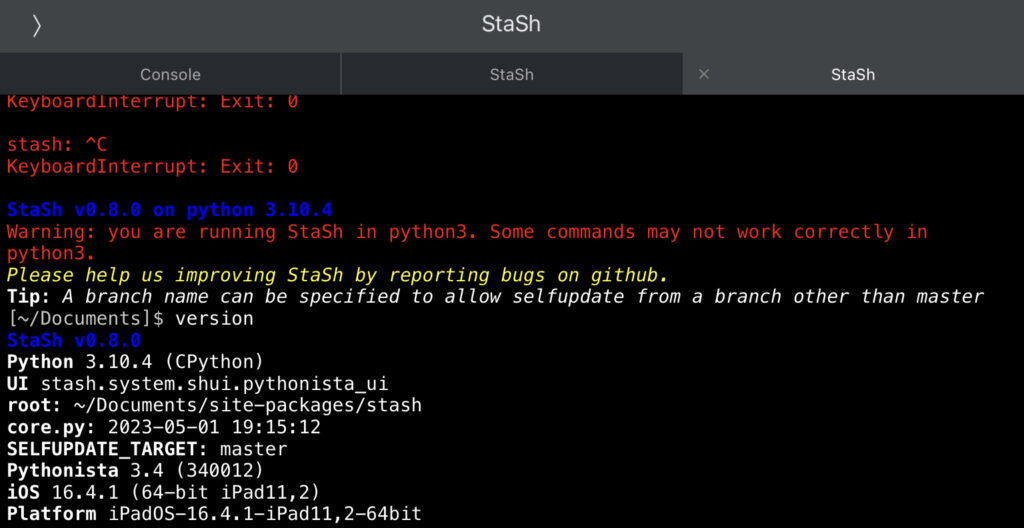
Some commands on StaSh, the shell-like powerful CLI add-on to Pythonista3, are written in Python 2. So, if you run it without specifying the version, you get the warning message below.

StaSh v0.7.2 on python 3.6.1
Warning: you are running StaSh in python3. Some commands may not work correctly in python3.
Please help us improving StaSh by reporting bugs on github.

In case you need to install Python 2 packages, you have to run StaSh in Python 2.7 and the warning message won’t appear.

StaSh v0.7.2 on python 2.7.12

Selecting the version everytime you launch StaSh is not smart, is it? 

Specify the Python version to execute your code

When you write a code, it is usually meant to be executed by a specific version, either 2.x or 3.x. Just like macOS or Linux, well, even simpler, you can specify the Python version at the first line – this method is called “Shebang”.

#! python2
# coding: utf-8
# Write your Python 2 codes below

Now you got the idea – yes, add the Shebang to a copy of the launch_stash.py and add it as a shortcut along with the original code so that you can quickly launch StaSh in your desired Python version.

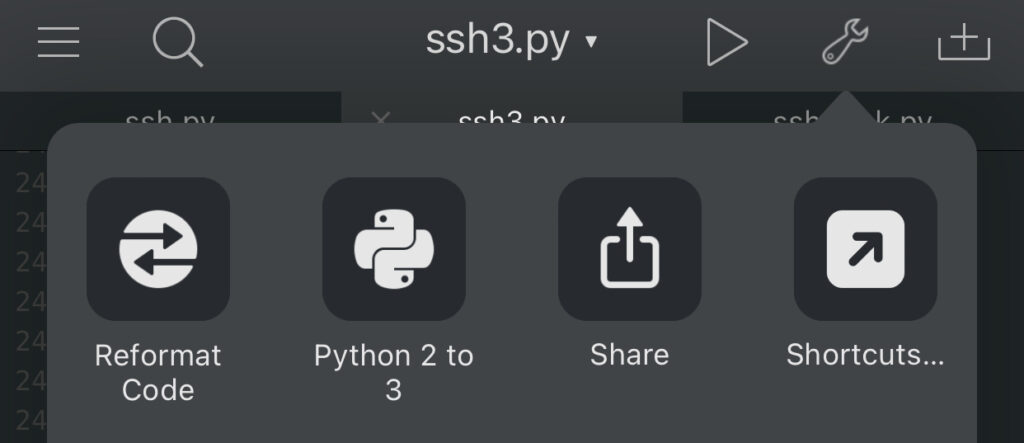
There are lots of useful legacy codes/packages written in Python 2 you can find in pip, in the Internet or books. Don’t spend too much time to hand-code and convert into Python 3. Simply run as-is and/or have Pythonista3 convert it to version 3 – you can find Python 2 to 3 tool in the spanner menu: 

IMG_9338.jpeg

Enjoy!

iOS Pythonista 3: Using SSH

Use SSH in Pythonista 3 (StaSh)

SSH in StaSh seems not to work if a passphrase is given to create keys. I found some hosting servers do not accept passphrase (password) to connect using SSH. In this post you can find a way to careate SSH keys in Pythonista 3 (SSH command in StaSh) with no passphrase.

Generate SSH keys in StaSh

$ ssh-keygen -t rsa -b 2048

Secret key and Public key are generated in the following path.

~/Documents/site-packages/stash/.ssh
$ ls
id_rsa id_rsa.pub

Copy the public key “id_rsa.pub” to your SSH server’s appropriate location.

SSH command to connect to your server

$ ssh username@username.xsrv.jp -p 10022

Above is an example to connect to XServer hosting server that I use. Change username, host name (“username.xsrv.jp” in this example) and port number (10022 in this case).

When you first run the ssh command in Pythonista 3, a terminal emulator “pyte” will be installed automatically. In this case you’ll see global name 'pyte' is not defined error message and need to quit and relaunch Pythonista 3.

Additional Notes – Set number of lines

Once the above is complete, you will want to add an alias (shortcut command) to the .stashrc file (Reference), copy the SSH keys to another SSH app, iOS device or computer. Make sure that you do not share “ids_rsa” the secret key file with anyone. Create .ssh folder in the same path if you use Pythonista 3 in another iOS device and place the ids_rsa file.

When connecting to a host, you will notice at least 3 lines from the top will be hidden as StaSh’s shortcut keys and iOS’s software keyboard will use 3 lines of the bottom of your screen. This is very annoying especially when you use ‘vi’ command to edit a file. To avoid this issue, one manual way is to use “stty” command to set your screen size (number of rows) every time you SSH to a server. Refer to examples below and find the best number for your environment.

$ stty rows 51 # Works best for iPad mini 2 + Bluetooth keyboard
$ stty rows 27 # Works best for iPhone 8 Plus with iOS software keyboard

Install py-tree on Pythonista3

How to install py-tree on Pythonista3 and use it easily.

With py-tree command, you can list files and directories in a tree view

[mysite]$ tree
.
|-- db.sqlite3
|-- manage.py
|-- mysite
|   |-- __init__.py
|   |-- settings.py
|   |-- urls.py
|   `-- wsgi.py
`-- polls
    |-- __init__.py
    |-- admin.py
    |-- apps.py
    |-- models.py
    |-- tests.py
    |-- urls.py
    |-- views.py
    `-- migrations
        |-- 0001_initial.py
        `-- __init__.py

Not only in Pythonista3 but also in many cases, you want to see all directories and files of your project in a better format in CLI, StaSh in Pythonista3’s case. The py-tree command is the solution.

Installation

You can easily install by running the following command in StaSh (type strings after the command prompt [stash]$ and hit [enter]).

[stash]$ pip install py-tree

Run the command by entering only “tree”.

Entering a dash “-” character in iPhone is a bit annoying so let’s create an alias tree.
In StaSh, you can create .stashrc file which works like .bashrc file for Linux’s  bash shell. Follow the example below to create an alias.

[stash]$ cd site-packages/stash/
[stash]$ la
.gitignore .stash_history .stash_tips .travis.yml CHANGES.md LICENSE README.md __init__.py bin docs getstash.py lib man stash.py system
[stash]$ touch .stashrc
[stash]$ echo "alias tree='py-tree'" >> .stashrc
[stash]$ cat .stashrc
alias tree='py-tree'
[stash]$ la
.gitignore .stash_history .stash_tips .stashrc .travis.yml CHANGES.md LICENSE README.md __init__.py bin docs getstash.py lib man stash.py system

Quit and relaunch Pythonista3 to let StaSh load the .stashrc file. Now you can use the tree command. Woo-hoo!

Create and edit files with different file extension than “xxx.py”.

You cannot create a file like “.stashrc” in Pythonista3 as it adds surfix “.py”. Also, once a file is created, it won’t appear in the file list to edit. So, when you need to create such a file, use touch command then use edit command to edit it in Pythonista’s Edit screen. ls -a or its alias la is the command to show invisible files in StaSh.

Summary

PurposeStaSh CommandExample
Create invisible file.touchtouch .invisible
Edit file in Pythonista3.editedit .invisible
List files including invisible files.ls -a
or simply
la
la
(la .*
lists only invisible files.)

Install and Setup Django in Pythonista3 (iOS app)

How to Set up Django in Pythonista3, iOS app for iPhone and iPad:

First, make sure you have StaSH installed in your Pythonista3 app.

In StaSH execute following command:

pip install Django==1.11.6

Select version “1.11.6” or Long Term Support version available. See Djangoproject.com website for the latest LTS version available. (Comment added on Jun 12, 2021) you may be able to execute “pip install django” and the version 3.2.4 will be installed. Specifya version only when necessary.

Quit and launch Pythonista <– This is one of most important steps when you make changes to Pythonista3!

Create an application (in stash)

django-admin.py startproject mysite

Quit and launch Pythonista

Open /mysite/manage.py
Go to console and run:

import sys
sys.path

Locate and copy a line like below where “…” is device specific.

/private/var/mobile/.../Documents/mysite

Go back to the edit page (manage.py).
Add a line like below under “import sys” — replace “PASTE HERE” with the line copied in the prev step. (Comment added on Jun 12, 2021) Removed unnecessary “=” after “append”.

sys.path.append(“PASTE HERE”)

So, it will look something like below:

sys.path.append("/private/var/mobile/Containers/Shared/AppGroup/C1F57ABC-DDDD-EEEE-FFFF-B0B0E0B0B0E7/Pythonista3/Documents/mysite/")

Quit and launch Pythonista

Open /mysite/manage.py, tap and hold the play (run) button and enter “runserver --noreload” as an argument. You may need to copy and paste “--noreload” without double-quotes.


If you see unforseen errors, quit Pythonista and relaunch then follow the steps again.
If successful, you see something like below in the Console:

Performing system checks...

System check identified no issues (0 silenced).

You have 13 unapplied migration(s). Your project may not work properly until you apply the migrations for app(s): admin, auth, contenttypes, sessions.
Run 'python manage.py migrate' to apply them.
November 03, 2017 - 20:46:35
Django version 1.11.6, using settings 'mysite.settings'
Starting development server at http://127.0.0.1:8000/
Quit the server with CONTROL-C.

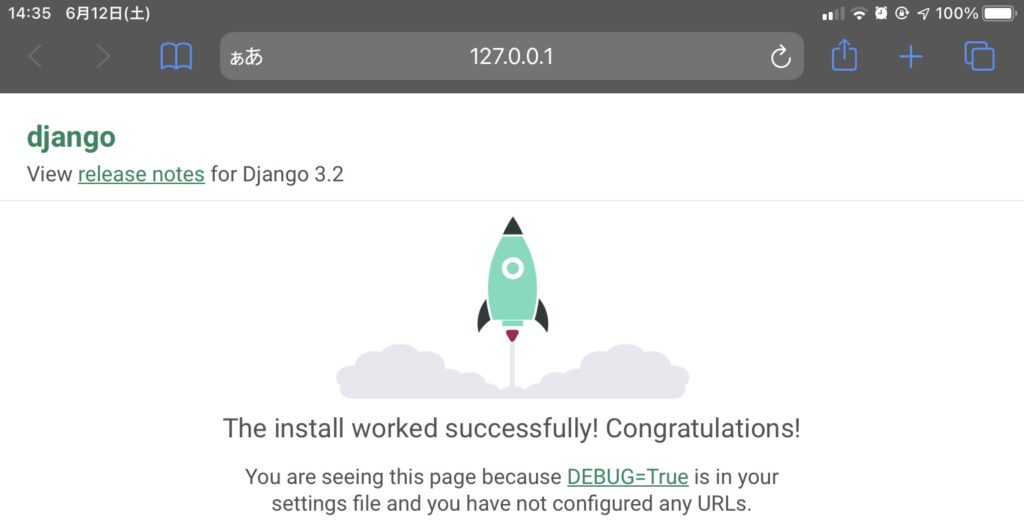
Now, open http://127.0.0.1:8000/ in Safari or any other web browser.

Version 3.2.4

If you see the “Congratulations!” page, your setup is complete, and it’s time to move forward to programing your own site/app.
Make sure you quit and relaunch Pythonista to properly apply your changes to your Django sites/apps.

StaSH log (installation of Django 1.11.6):

[~/Documents]$ pip list
[~/Documents]$
[~/Documents]$
[~/Documents]$ pip install django
Querying PyPI ...
Error: Source distribution not available for Django: 2.0b1
[~/Documents]$ pip install Django==1.11.6
Querying PyPI ...
Downloading package ...
Opening: https://pypi.python.org/packages/13/26/f3841e00663027ba7cf7ce7ba2cabb682a83cf0629bef013d70bebefa69d/Django-1.11.6.tar.gz
Save as: /private/var/mobile/Containers/Data/Application/20C8FA54-EEEE-FFFF-8888-3BACC5555555/tmp//Django-1.11.6.tar.gz (7874450 bytes)
7874450 [100.00%]
Extracting archive file ...
Archive extracted.
Running setup file ...
Handling commandline script: django/bin/django-admin.py
Package installed: Django
Dependency available in Pythonista bundle : pytz
[~/Documents]$
[~/Documents]$
[~/Documents]$ which django
[~/Documents]$ pip list
Django (2.0b1) - A high-level Python Web framework that encourages rapid development and clean, pragmatic design.
[~/Documents]$
© Peddals.com